How to Make a Pinwheel Quilt
How to make a Pinwheel Quilt
This is yet another quilt I made for my grandson. He loves it when I make things especially for him. He adores cars and trucks, so when I saw this material, I knew it had to be something for him. I had been wanting to try this technique to make pinwheels and it works marvelously! Read on to learn how to make a pinwheel quilt.
As always, I recommend a high quality fabric. That is, it needs to have a tight weave. (not loosely woven). Your quilt will last a long time if you use high quality fabric. The fabric needs to be 100” cotton.
Some links are affiliate links. I may earn a small commission with no additional cost to you.
Supplies for How to make a Pinwheel Quilt:
Thread
Your choice of fabric
You can use a good pair of fabric scissors or use a rotary cutter with a rotary mat and a quilting ruler. I find it is so much more precise to use a rotary cutter.
Time to Cut:
Cut Fabric #1 and Fabric #2
Next, cut the two fabrics that make the pinwheel into 11” squares. You will need 9 squares of each fabric.
Finally, cut Fabric #3
This will be the larger print. Cut (17) 9 1/2” squares of Fabric #3.
You can find a free PDF with pattern and instructions in my resource library. Read to the bottom of this post about how to get the password.
Let’s Sew Now:
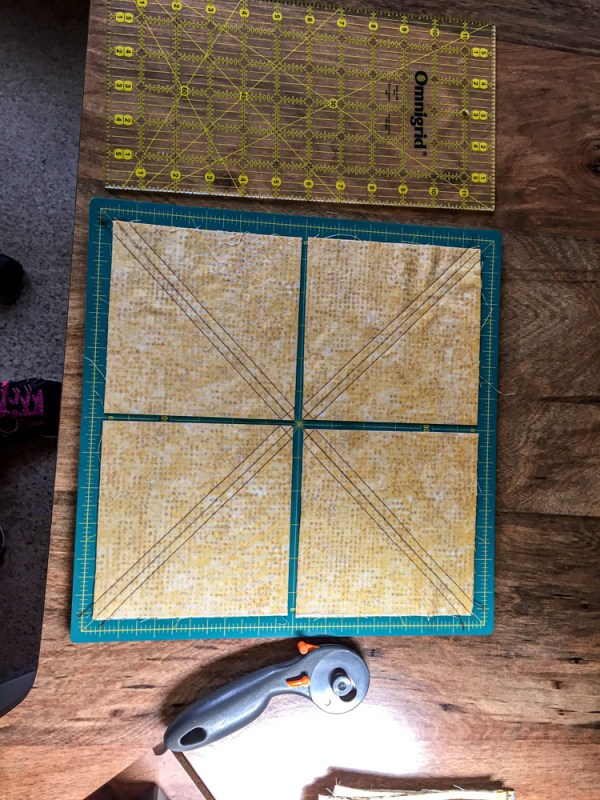
This technique will make (8) half square triangles out of each square. This is so much faster and easier than cutting out each triangle. Take Fabric #1 and draw a diagonal line from corner to corner, from each corner. It makes an X in the square.


Place right sides together of Fabric #1 and #2. Sew a straight stitch 1/4” from each drawn line. Sew another 1/4” on the other side of the line. Subsequently, sew on each side of the other diagonal line.

Cut Your Pinwheels:
Cut the square in half horizontally and vertically through the center. Next, cut the triangles on the lines. Voila, you have 8 triangles, which makes two squares. Repeat with the rest of your squares. This method is so cool. You don’t have to cut all the little squares first!! Magical…


Press and Sew:
Press the seams open on each half square triangle.
Sew four squares together to make one block. Press the seams to the darker side. You should have 18 pinwheel squares.
Time to Sew Again
Using 1/4” seam allowance, join Fabric #3 to a pinwheel square. Repeat until you have 5 squares across to make one row. Press the seams toward Fabric #3.
Sew the squares together by row. Subsequently, sew the columns together, pressing after each column.
You can add a border if you want it a little larger.
You are now ready to quilt it. Sew the backing together or use a 108” wide fabric. Lay out the backing on the floor, right side down. Spray with a fabric adhesive. Layer the batting on the backing. Spray with a fabric adhesive. Apply the top of the quilt on the batting with the right side up.
Quilting:
Quilt your layered pieces as desired. I quilted using a free motion to look like a road. You can always stitch in the ditch. Trim the edges even after quilted.

I used a fabric marker for lines to see where to add my quilting stitch. I sprayed water on it to remove the lines.

Binding:
Add the binding to your quilt. Cut 2 1/2” bias strips and sew them together. Fold in half wrong sides together. Press. Sew 3/8” seams and add the binding to the top of the quilt. Hand stitch down on the back side.
In Conclusion –
Voila – you have a quilt. The finished measurements are 45” x 63”. You can always add more squares for a larger size.

My Grandson was so excited that I made this especially for him. Add a picture of your quilt in the comments below.
Download the free pattern from my resource library. (get the password for the pattern by filling out this form).
Pin for later:
Check out this post on How to make a fleece blanket with satin binding.
Another cute quilt for your grandson is How to make a Super Mario Quilt.


