Sling Chair Repair
Sling Chair Repair
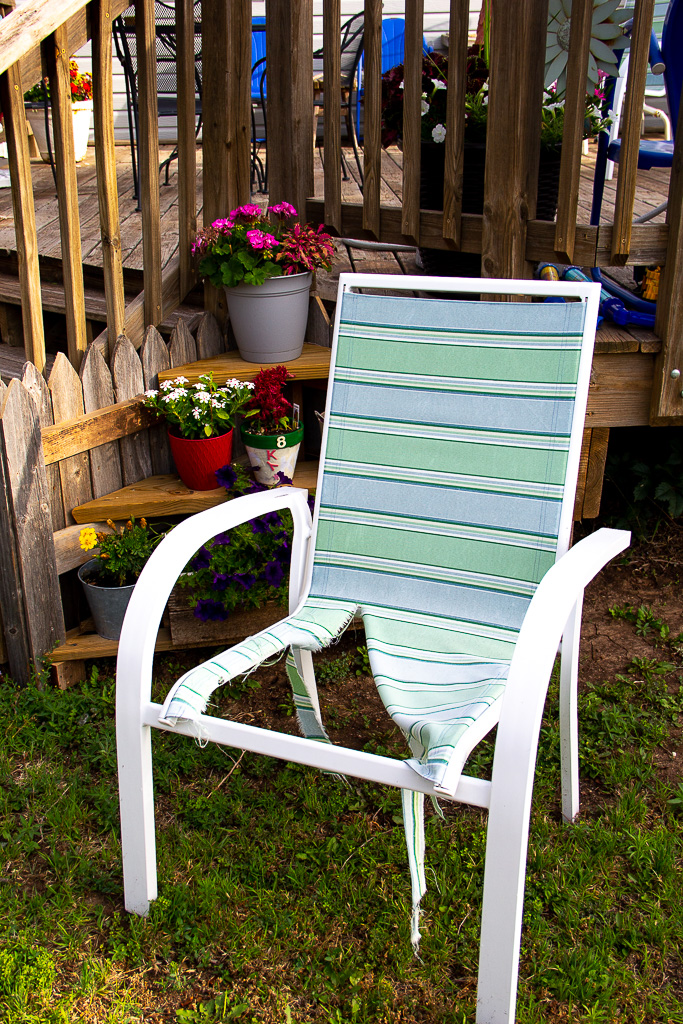
I was lucky enough to have been handed some patio sling chairs that were about to be thrown out because the slings were torn and damaged. They were made of white powder coated, rust resistant, steel frames. Therefore, there was no question that I shouldn’t set out to do some patio sling chair repair.
Sling furniture is made for form-fitting comfort. They are ideal for patio or pool areas, because of it’s quick drying properties.
The fabric was worn out and torn apart. Three years earlier, I replaced the slings with a sturdy outdoor fabric. However; after sitting out in the sun and the weather, the sling fabric tore.


Determined to make the fabric last, I spent a little more money on the good stuff. You can definitely tell that this fabric is awesome. I chose red to match my front and back doors. I purchased phifertex fabric.
Supplies needed:
Thread
socket wrench or ratchet
Instructions:
All chairs are not created equal. In measurements, that is.
Cut the material right down the middle to make it easier to remove.
Disassemble:
Remove the plugs on the end of the rail with a screwdriver.
Pull the fabric out from the rails. Take the splines out of the fabric to use again.
My grandson and husband were a big help. And you will need more than your own two hands. (believe me)


My chairs had 6 bolts holding the top frame to the bottom frame. Use a socket wrench or ratchet to remove the bolts. This would be a good time to touch up the paint if needed.

 Piece together your torn fabric and get a measurement. Mine measured 18” wide by 40 1/2” long. Add the seam measurements to figure out the size to cut it.
40 1/2” + 1/2” seam at top + 1/2” seam at bottom = 41 1/2”
18” + 1 1/2” seam on right side + 1 1/2” seam on left side + 1/2” ease = 21 1/2”
The fabric was 54” wide. Cut your piece 21 1/2” x 41 1/2”. 1 1/2 yards will make 2 chairs.
I laid the fabric out in the floor and used the tape measure to mark my measurements.


If you need a quick lesson on sewing, check out this post about 5 steps you can take right now to learn to sew.
The first one I made, I turned the seams under twice. It was way too thick to fit through the channel, so I had to take the stitching out so that it was only a single fold and not a double fold.
Fold over once 1/2” and stitch at the top and at the bottom, 1/8” from each raw edge. My stitch length was set at 2.0 and I used a #12 universal needle. The edge will not ravel.
Fold over the sides on each side 1 1/2” and stitch 1/8” from edge. Use the presser foot as a guide and make another seam so that you have 2 seams on each side. This little homemade piece of wood that I made is a wooden iron. It is helpful for pressing down the seams.

Reassemble:
Insert the spline into the opening on each side. Now slide the spline and fabric into the channel. I won’t lie – it is very hard to slide in. We put a little baby powder in the channel to help it slide in. We also had to pull it into the channel using a pair of needle nosed pliers. Pull on one side and then the other, a little bit at a time, until it reaches the end.
Put the end caps back on the end of the channel.


Place the top frame on the bottom frame and put the bolts back in place.

Voila! New Chair after sling chair repair!

I’m so happy with how it turned out. I had 6 chairs to finish. And I also had 2 lounge chairs. So, if you have these, I wanted to share my measurements with you. I needed 2 1/2 yards for both chairs.
These loungers had a top piece and a bottom piece separately.
Top finished measurement – 20 1/4” x 29 1/2”
20 1/4” + 3 1/4” for seams = 23 1/2” (cut)
29 1/2” + 1/2” seam + 1/2” seam = 30 1/2” (cut)
Bottom finished measurement – 21 1/4” x 47 1/2”
21 1/4” + 3 1/4” for seams = 24 1/2” (cut)
47 1/2” + 1/2” seam + 1/2” seam = 48 1/2” (cut)
So for both loungers:
Cut 2 pieces – 23 1/2” x 30 1/2”
Cut 2 pieces – 24 1/2” x 48 1/2”
The top (back) piece is attached the same as the chairs.
The bottom piece is attached on one side then the other because the rails are separate with a spacer bar between them. Slide on one side, then on the other. Insert the spacer bar.
Attach all the bolts and you have two new chairs!!
In conclusion:
These chairs look brand new and they are so comfy. I challenge you to try and make your own.

Pin it to remember it:


